Creating Storyline Interactions for Articulate Rise
Quite often, we receive requests from clients to add more interactive elements into an Articulate Rise build to suit the needs of their learners.
The roadblock is – Articulate Rise is very limited in type of interactivity, look and feel and customisation capabilities. Cue Articulate Storyline 360 – this program is quite like Macromedia Director (which is what I studied when learning Multimedia in 2003 – that ages me), so I am very aware of the interactives you can achieve using this tool.
Now, many SCORM builds are created in Articulate Rise for ease of mobile learning, accessibility, and quite frankly – speed, speed, speed. I personally find Rise waaaay quicker to build a cohesive course compared to an end-to-end Storyline build. (the budgets for the two options vary differently FYI clients).
BUT there is a way to marry the two together like the perfect couple (Think Goldie Hawn and Kurt Russell).
To add custom interactivities that align with the existing branded elements, but provides a different option for clients rather than what Rise has to offer – we can develop singular Storyline builds to embed within Rise.
Option 1: Seamless Blend
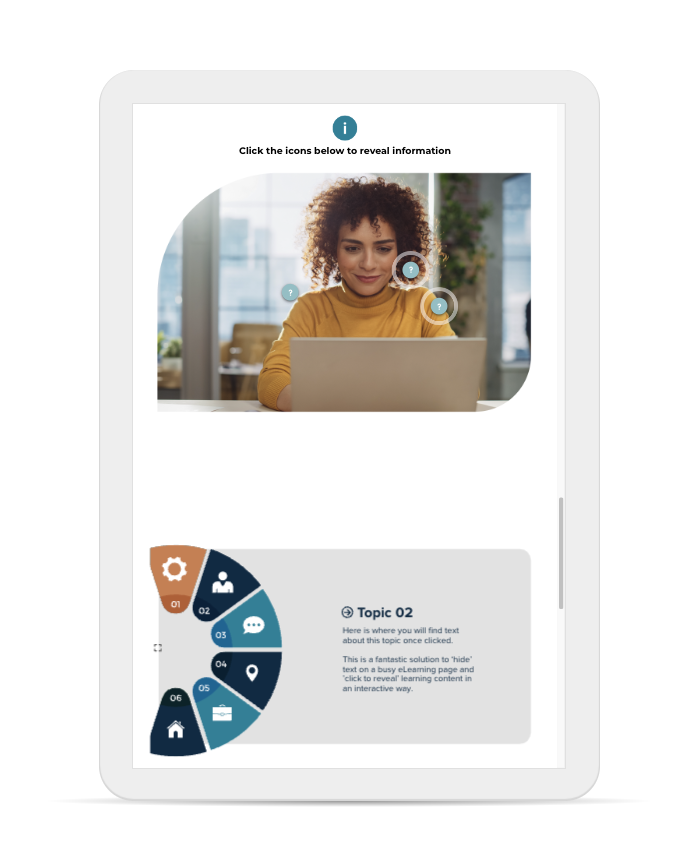
The end result can look like such:
In this example, the background is transparent so it blends into the Rise build. The top sample is a Labelled graphic within Rise, the bottom is a custom infographic created in Storyline with click to reveals and animations. As you can see this is a really simple way to present text and add larger, chunkier paragraphs.
Option 2: A course within a course
Another way to utilise Storyline within Rise is as a mini-course – this would include its own navigation, next buttons and UI to match the existing Rise look and feel. For example:
In this example, the client wanted the learner to learn within Rise, but then ‘step-in’ to a mini gamified world for further content. This required a series of Storyline builds, with a home button, next buttons, animation and icon state changes when buttons were clicked. The beauty of creating a Storyline build like this, means you can also export to SCORM for LMS upload, should the client want to use this as a stand-alone module.
When we offer the storyline option, the response we receive from our clients is that we were able to create an Articulate Rise course without it looking like a standard copy-paste version of a Rise template.
So, how do you apply this to your own practice, you ask?
Custom course development such as this requires: (Click the titles below)
-
You will need basic knowledge of how to embed a published Articulate Storyline Review link into Rise.
-
You will need to know to how to create rollovers, button states, triggers (eg. show layer B when user clicks B), layers, adding animations and transitions to elements. You will require knowledge of exporting in the correct way to show the interaction as intended in Rise.
-
We use Adobe Illustrator to create all branded elements, so that usage of Storyline provided assets is limited. We create the layout in AI, then export each asset as a .PNG or .SVG to import into Storyline. We do this because ee want to curate a bespoke, branded user interface for our lovely clients – something that they haven’t seen before!
-
Applying principles such as balance, alignment, contrast, repetition, proximity, line, scale, emphasis, white space – the list goes on. UI layout skills and knowledge of design principles will help achieve the desired end result for our clients.
Good luck with your eLearning development journey – we love sharing our work and hope you enjoy learning a little more from Bolde Learning.
For more tips and tricks, follow Bolde Learning on YouTube Channel below:


